Uncategorized

HOW TO BECOME A MINIMALIST

Minimalist-Thumbnail.png

Sure the concept of being a minimalist sounds mind-boggling and the mere thought of only owning 20 pieces of clothing is scary. Trust me I’ve been there. Growing up in an environment where having less meant you had no money, was the last image I wanted to portray. I would never in a million years believe becoming a minimalist or possessing a few items would bring so much joy and clarity to my life, but it has. The misconception of this lifestyle has brought on frowns but today I will introduce five steps on how you can become a minimalist and enjoy your life.  

STEP 1: DISCIPLINE

Remember being a minimalist is a lifestyle and in order to change the way you live, you first have to change the way you think. That shopping habit you once had will have to cease. I know that’s hard to swallow but in order to live with less and clutter-free you have to buy less. It takes discipline and with time, you will succeed.

STEP 2: PACE YOURSELF

The most important thing you can do is start slow. Begin decluttering your car first then maybe your coat closet. The name of the game is to create order in your life at a steady and consistent speed. The slower you start, the quicker you will get to what you desire.

STEP 3: DEDICATE TIME

Since you are making a transition, you will need time to let most of your possessions go. This is probably the toughest part of it all and the most time consuming — unless you’re like me and hold no sentimental value to anything you own. Take each day one by one to decide on the items you want to keep and discard. Once you're done, organize the items that are left behind, sit back and throw your feet up! Remember to donate your clothes and gadgets to your local charity.

STEP 4: MAKE A PLAN

As your home is transforming, it is important to plan out how you want your home to look and feel. As you’ve probably seen during your research many people associating minimalism with a particular “look” — white walls, black/gray accessories and plants. Though this style is popular in the minimalist world, it’s not the defining style for being a minimalist. Having a minimalist and organized home comes in various colors and styles. As long as you create a space that serves you, that's what’s important.

STEP 5: LEARN TO SAY NO

No one likes to say no or be told no especially when it comes to getting something you really want. The beautiful thing about life is that we have choices, everyday and every second we are presented with choices. You can choose to buy those glittering shoes or that extra pillow or you can choose to walk away. In order to truly adopt a minimalistic lifestyle you will have to embrace the power of No to enhance your life. The joy of it all is if you made a mistake yesterday, today you can choose to change.

If you’re interested in learning more about how to become a minimalist, email us at info@rescuemyspace.com

Rescue My Space provides organizing solutions to individuals that are busy, overwhelmed, tired of living in clutter and ready to make a change the modern way. For more than five years we have been helping people reclaim their life back by showing them how to maintain an organized space. There are no projects that are too big for us and we believe everyone deserves a space to relax and enjoy. For more information on how to hire Judi as your personal organizer, visit her website at www.rescuemyspace.com.
DIY Copper Pipe Ladder

It wasn’t until a couple months ago when I discovered the beauty of copper pipes. I was walking in Home Depot and came across this lovely rustic material. It was surrounded by its peers but stuck out like a sore thumb. That day I bought it and did some research that led me to make my very first copper pipe design -- a clothes rack. I love this rack so much, I had to extend the design further in my home and make others.  

Under Sink Organization — Bathroom Edition

I understand this is an area that gets neglected. It not only houses everything, it also has weird, and in most cases unusable, space due to pipes and it can be particularly difficult to make it look and stay organized. However, the silver lining is this area is a great space for anything you want to place in it. With all its curves, in order to maximize its space, you will need to find storage solutions that come in various sizes and shapes and let me not forgot plan it out before.

DIY Copper Pipe Magazine Rack

DIY Copper Pipe Magazine Rack with Rescue My Space.jpg

Hello again! Here’s another copper pipe DIY that is a new addition to my home. This creation is not only for magazines  it can also be used for books, remote controls, or for decorations. The ideas are endless.  

So let’s get started. For this project, you’ll need:

  • 1-10 feet of 1/2" copper pipe

  • 8 – 90º copper elbows

  • 1/2″ tube cutter

  • tape measure

  • 2 – pieces of fabric at approx. 34″ x 16″

  • iron on adhesive

  • iron

  • glue

Materials Needed For DIY Copper Pipe Magazine with Rescue My Space.jpg

Step 1: Measure and cut the pipe using the tube cutter. Mark where you want the pipe cut, tighten the tube cutter around the pipe, twist, tighten the little orange knob, twist some more, and keep doing that until the pipe is cut. This process is so much easier than it sounds!

Cut pipe into the below measurements:

  • 2 (18") pieces

  • 4 (16”) pieces

  • 2 (9.5”) pieces

The below picture is the bottom portion:

Copper Pipe Needed For Copper Pipe Magazine Rack.jpg

Step 2: Lay the pipe pieces and copper pressure tees out on the floor forming 2 “U” shapes with the 9” and 14” pipe pieces with the copper elbows and 2 long bars with the 17” pipes with elbows on each side. Glue and set aside.

U Shape Copper Pipe For Magazine Rack.jpg

Step 3 (Optional): Spray paint the pipes pieces.

How To Spray Paint Copper Pipe For Magazine Rack.jpg

The Fabric Portion

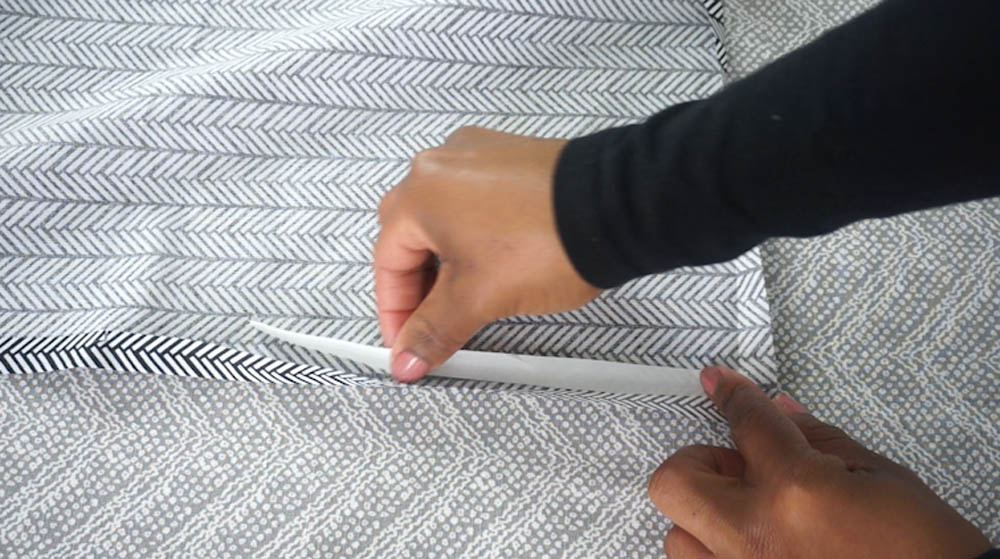
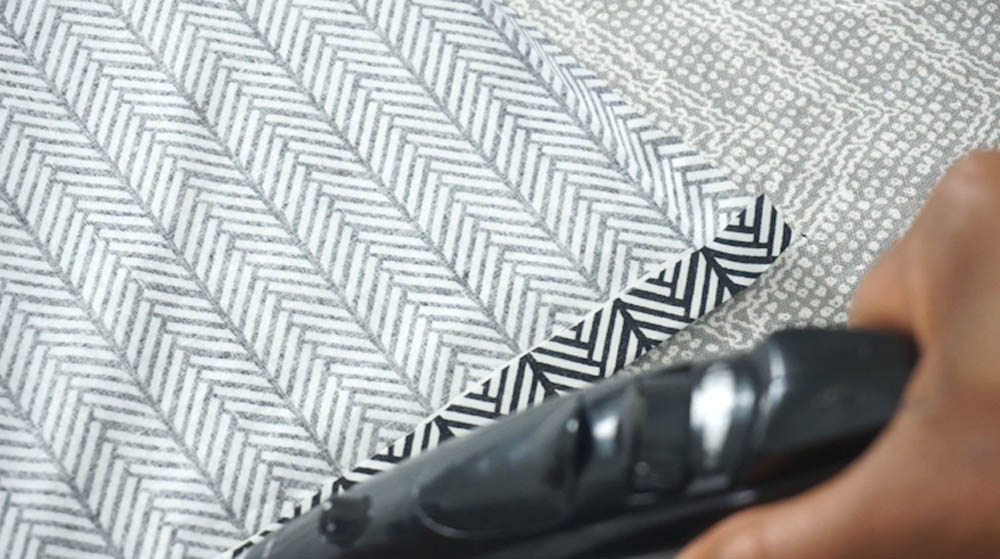
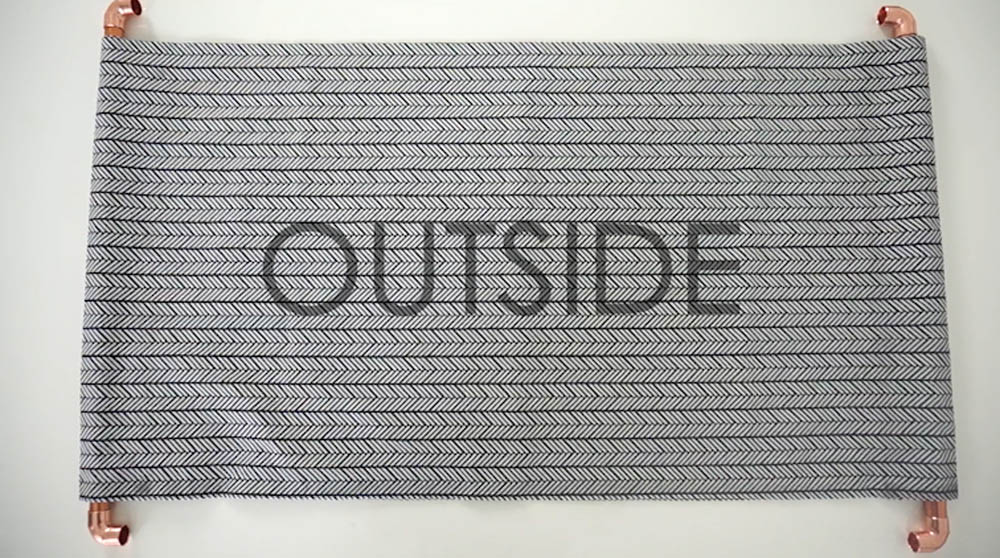
Step 4: Create a hem of about 1/2” all around both pieces of fabric, glue down using your non-stitch glue and iron. Next, fuse and glue both fabrics together creating an opening for the longer pipe pieces and insert them into the fabric.

How To Cut Fabric For Copper Pipe Magazine Rack.jpg
Cutting Fabric for DIY Copper Pipe Magazine Rack With Judi The Organizer Hands.jpg
Using Glue Gun With Fabric For Copper Pipe Magazine Rack with Judi The Organizer Hand.jpg
Fabric for Copper Pipe Before Pipe Is Installed on Both Sides.jpg
Inside Of Copper Pipe Magazine Rack Fabric with Rescue My Space.jpg
Outside of Copper Pipe Magazine Rack Fabric with Rescue My Space.jpg

Step 5: Lastly, put the pipe pieces together. If you want the option to wash or switch out your fabric, don’t glue the two longer pipe pieces to the rest of the structure.

Here’s the final product!

DIY Copper Pipe Magazine Rack Finished By Judi The Organizer With Rescue My Space.jpg

What do you think?

If you end up creating this DIY, please send me pictures!

Thank you!

How To Make A Vision Board

VISIONBOARD-THUMBNAIL.png

So my birthday was last week (April 24th and I turned 29) and as I turned one year older, I realized the visions I had for the past year didn’t really happen. I felt I worked hard but I was lacking. After doing a lot of internal discovering, I decided to create a vision board. Though this wouldn't be my first time creating one, this time I put a lot of thought and really put my heart into it.

Because a vision board is a place to display your dreams, inspirations and goals, I've discovered in order to truly reap the benefits of your vision board it is essential to come at it with true authenticity and belief. Keep in mind, a vision board is a guide that helps you achieve your true passions so the more you view it and believe in it, the more your dreams will come true.

I’ve decided to do mine a little different than the traditional way. Because our vision tends to change as time progresses, I wanted to make sure it would be easy for me to add, remove and move around items on my board.

Below are the items materials I used:

IMG_7635.jpg
  • Magazines
  • Scissors
  • Glue/tape
  • Pinterest (images & quotes)
  • Pictures of yourself/loved ones

THE BREAKDOWN

Before I began cutting, printing or writing I first wrote down all of my aspirations/goals for the year. This may take a while, since this process requires that you jot down goals for the year. After jotting all of your ideas down, its now time to be creative!

Next, search for all of the images, words, colors - everything you want to add onto your vision board.

IMG_7633.jpg

Before printing out all the images I found on Pinterest, I placed all images/quotes on a word document and formatted them.

IMG_7637.png

After that, cut out all the things you want to put on your board.

IMG_7634.jpg

Once that's done, determine where you want to place each item on your board. You can create different sections in your vision board but I decided to keep it as authentic and real as my vision!

IMG_7636.jpg

After you’ve figured out where you want to place everything and how you want your vision board to look, it’s time to put together your board.

MY MASTERPIECE

This is how my board came out. It has everything that resembles my vision and wants for my life this year. It’s kind of like a piece of my heart on paper or in my case on metal.

IMG_7600.jpg

If you’re interesting in hearing the breakdown of my board, CLICK HERE. I created a detailed video explaining the whole thing.

Thank you so much for reading my post today. I'll talk to you tomorrow!

Organizing Series DAY #3 — Closet Part 2

Welcome to Day 3 of the RMS 3-Day organizing series. If you haven't read Day 2 of the organizing series stop and read it now. Before we begin, make sure you print out my Organizing Series Checklist which itemizes the items that you may have in your space, let's you know the number of items you have and will help you through this journey.

Let’s get right into it.

STEP #1

Go back into your closet and take out all of your tops and shoes. As mentioned before, this will make the de-cluttering process so much easier.

closet3.jpg

Group your like items with like items and the odd ones together just as before.

 STEP #2

Just like on Day 2, go through each item and ask yourself these questions:

  1. When's the last time I wore this?
  2. Does it fit my current style?
  3. Do I need it?
  4. Do I truly love it?
  5. Does it help boost my confidence?

Make sure you hold each item and feel it. Hold it up so it's in your face and feel the energy it's letting off. For your shoes, put them on and walk with them. Walk around your home and sink into them. If after one minute you realize the luster for them start to diminish take them off and look at them if you still don’t love them, then let them go!

Trust me, years ago this was probably the hardest thing for me to do because the more things I had the better I felt. The more I had equated to abundance which today is not the case at all for me. You realize the less stuff you have the more you have internally and to me, that’s the most important.

If you don't feel love for the item then it's time to find it another home.

For the items you are donating, which are stuff that brings no value to your life today, put them in a bag and put them in your car trunk. Once you’re done, you can take your donation bags either to your local charity. The great thing about this is your donation can be added to your next year taxes. So when you drop it off make sure you take the donations receipt from your charity of choice and store it safely.

STEP #3

Now it’s time to put your items back into the closet.

STEP #4

As in Step #1, let's decide the different categories where your tops will be placed. I am using the same dividers just so you can see where I place them. Because our tops come in a variety of variations, let's take a few minutes to differentiate.

STEP #5

Beginning from the left I hang my most dainty or spaghetti strap tops first. As mentioned before, I don't follow a color wheel. I just place colors next to other colors that are similar or in contrast.

After spaghetti straps, I place no sleeve tops next. After that, I place short sleeves and end with long sleeves. After the long sleeve tops, I place my blazers then coats at the end.

I fold my sweaters to prevent them from stretching and place them in bins.

ALL DONE

That's it. You did it again. You've just completed the 3-Day series. Congratulations to everyone who was able to finish the entire series. It wasn’t an easy thing to do, but you stuck in there and did it! That shows a lot about the person you are.

Now that you've accomplished this goal treat yourself to something you love.

If you liked this series, please let me know in the comments section. Thanks so much for participating in this 3-Day series and I’ll talk to you soon. BYE!!!!!

Organizing Series DAY #2 — Closet Part 1

Welcome to Day 2 of the RMS 3-Day Organizing Series. If you haven't read Day 1 of the series, it’s best you read it now. In today's video we will be focusing on the closet. Because this area is full of memories and possessions and space I will be splitting this area into two parts. Part 1 will focus on dresses, bags and bottoms (jeans, skirts, shorts and pants).