
Welcome to Day 1 of the RMS 3-Day organizing series. My goal for this series is to help you start your organizing journey. Before you continue reading, make sure you print out my RMS Organizing Series Checklist which itemizes the items that you may have in your space, let's you know the number of items you have and will help you through this journey.
In Day 1 we will focus on our dresser drawers. I also have a video (click here), which will help you visualize how you can organize your drawers efficiently.
Drawers are a place that accumulates the most clutter plus because they are hidden, we tend to forget what we have in them. Though drawers are one of the smaller entities in our homes, they are the most impactful in our daily routine.
The reason I’ve broken down this series into three days is so that you’re able to focus on your goal for the day as well as prevent you from getting overwhelmed.
Without further ado, let's get into it:
STEP #1
First, write down the goals that you want to achieve with your drawers. This is the most important thing to do because when you write down anything, it programs your goals into your subconscious mind, which activates the front lobe of your brain (the initiation lobe) and helps you be the most productive in accomplishing your goals.
STEP #2
Take everything out of your drawers and place them on a flat surface. This can either be on your bed or the floor.
STEP #3
Go through each item and ask yourself these questions:
- When's the last time I wore this?
- Does it fit my current style?
- Do I need it? For example, if it's wintertime and you have that one coat or sweater that has seen better days but keeps you the warmest then keep it.
- Do I truly love it?
- Does it help boost my confidence?
These questions are specifically for our clothes because clothes are like armor we wear to protect ourselves from the world. This also helps with our confidence, which is especially key when it comes to change.
For items that don't belong in your drawers, put those aside. Once you’re done you can put these items in their actual places.
STEP #4
Create four piles for items you will be keeping, throwing away, donating to charity, and/or giving away to family/friends. Though I don’t encourage you to spread clutter to others, I do believe in placing your items in good homes.
STEP #5
Bag the items you won't be keeping, throw the ones you want to discard away quick and place the bag(s) for charity in your car. The reason for this is because the goal is to remove clutter and prevent you from going back into the bags; picking items from it and putting them back in your space.
STEP #6
Once you've acknowledged the items you will be keeping, it’s time to figure where things will go.
Let's start with the top drawer. In this video I am using my dresser that has three drawers. This drawer was purchased from IKEA and the knobs from Home Goods.
It’s up to you what you want to keep in this drawer but I like to do it in the order I get dressed.
Again, it’s all up to the way you function in your home.
You can use drawer dividers if you want as I do. This helps keep items in place especially with the constant movement.
My Dresser Drawer Order
In my case the top drawer will hold my undergarments. Though socks are probably the last item I put on, I like to put them in my top drawer because I don’t have a lot of them. This is also a great place to keep your lingerie and related items.
Casual bottoms are next so those get placed in the second drawer. As I mentioned, I like to follow the order in which I get ready so for some of you this might be your top drawer, second drawer or last drawer.
Once you've decided where you want to place your items, start folding each item. If you’re unsure on what folding technique to use, I’ve created a folding video (click here) which gives you four techniques to choose from, my favorite is the R4! Socks are typically last for me, but I like to keep those on the top drawer because I don’t have a lot of them.
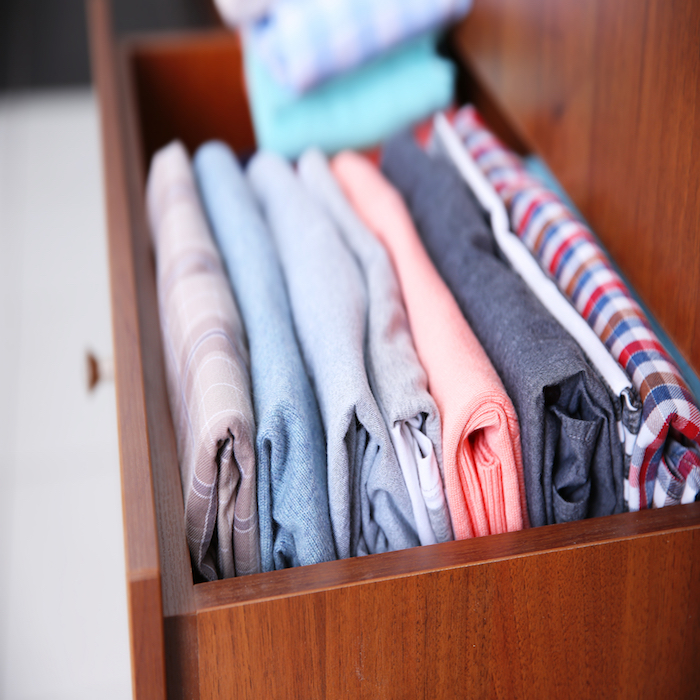
Once you've folded all of your clothes set them aside, it’s time to wipe down your drawers. It's probably been a while since you've done this and now is the perfect time. Once that's done, it's time to place your clothes in the drawer. I don't care to follow a color wheel but I do like to put the same colors or like colors next to each other.
If you've noticed that most of your clothes aren’t fitting in the drawers then go back to Step 3 and get rid of more clothes.
The next drawer is typically for tops. Just follow the process I use for the previous drawer.
The bottom drawer or drawers can be used for items like extra bed linens, scarves, and workout clothes. It’s all up to what you like or you can leave them empty.
Once you’re done with this step, you are done! You did it, you've just completed organizing your drawers. Now that you've accomplished this goal treat yourself to something delicious.
You're one-third completed and the finish line is in view. Tomorrow we will focusing on Part 1 — Closet. Feel free to comment below and let me know if this was at all helpful for you. Talk to you tomorrow!